
FRPS内网穿透教程
温馨提示:
本文最后更新于 2026年01月08日,已超过 163 天没有更新。若文章内的图片失效(无法正常加载),请留言反馈或直接联系我。
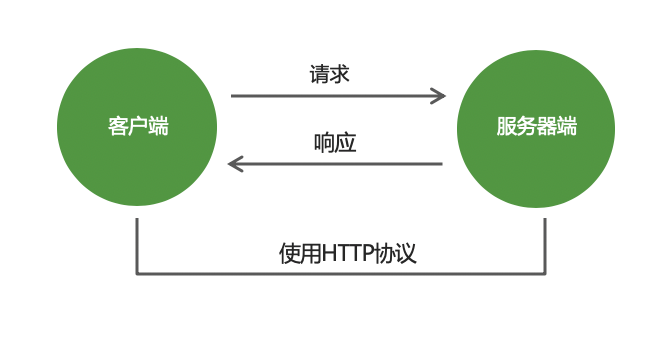
一、基本原理

二、服务端配置(frps)
假设服务器IP地址为:39.108.108.108
2.1 下载frp
# 访问GitHub发布页下载对应版本
# https://github.com/fatedier/frp/releases

# 以Linux x86_64为例
cd /devSoft/
wget https://github.com/fatedier/frp/releases/download/v0.54.0/frp_0.54.0_linux_amd64.tar.gz
tar -zxvf frp_0.54.0_linux_amd64.tar.gz
mv frp_0.54.0_linux_amd64 frp_0.54.0
2.2 配置服务端
[common]
# 服务器监听端口
bind_port = 7000

# 认证方式(建议设置)
token = asdfqwer

# 控制台端口(可选)
dashboard_port = 7500
dashboard_user = admin
dashboard_pwd = admin123

# 日志配置
log_file = ./frps.log
log_level = info
log_max_days = 3
2.3 启动服务端
# 前台运行
./frps -c frps.ini

# 后台运行
nohup ./frps -c frps.ini > frps.log 2>&1 &

# 使用systemd(推荐)
sudo vim /etc/systemd/system/frps.service
2.4 systemd配置文件示例
[Unit]
Description=Frp Server Service
After=network.target

[Service]
Type=simple
User=nobody
Restart=on-failure
RestartSec=5s
ExecStart=/devSoft/frp_0.54.0/frps -c /devSoft/frp_0.54.0/frps.ini

[Install]
WantedBy=multi-user.target
2.5 启用并启动
sudo systemctl enable frps
sudo systemctl start frps
sudo systemctl status frps
三、客户端配置(frpc)
3.1 客户端下载(以Windows为例)
● 下载对应平台的客户端
● 解压后编辑frpc.ini
3.2 常见场景配置
场景1:Web服务穿透
[common]
# 服务器IP,此处需填写为实际具有公网IP的服务器IP地址
server_addr = 39.108.108.108
server_port = 7000
token = asdfqwer

[web]
type = tcp
# 本地服务器的实际IP,可以是本机或者局域网内的其他可达IP
local_ip = 127.0.0.1
local_port = 80
remote_port = 8080
场景2:SSH远程访问
[ssh]
type = tcp
local_ip = 127.0.0.1
local_port = 22
remote_port = 6000
场景3:远程桌面(RDP)
[rdp]
type = tcp
local_ip = 127.0.0.1
local_port = 3389
remote_port = 7001
场景4:HTTPS网站
[https-site]
type = tcp
local_ip = 127.0.0.1
local_port = 443
remote_port = 8443
# 自定义域名
custom_domains = your.domain.com
场景5:多服务配置
[common]
server_addr = 39.108.108.108
server_port = 7000
token = asdfqwer

[web1]
type = tcp
local_port = 80
remote_port = 8080

[web2]
type = tcp
local_port = 8080
remote_port = 8081

[ssh]
type = tcp
local_port = 22
remote_port = 6000
3.3 启动客户端
# Linux
./frpc -c frpc.ini

# Windows
frpc.exe -c frpc.ini
四、高级配置
4.1 域名访问(需备案域名)
[web]
type = http
local_port = 80
custom_domains = testweb.iquanzi.top

# 子域名配置
subdomain = web1
4.2 负载均衡
[range:web_balance]
type = tcp
local_ip = 127.0.0.1
local_port = 10000-10010
remote_port = 20000-20010
4.3 安全配置
[common]
tls_enable = true
# 更多安全选项...
五、防火墙配置
# 开放端口(示例)
sudo ufw allow 7000/tcp
sudo ufw allow 7500/tcp
sudo ufw allow 8080/tcp
sudo ufw reload
六、常见问题
6.1 连接失败
● 检查服务器端口是否开放
● 确认token配置一致
● 查看防火墙设置
6.2 无法访问
# 查看日志
tail -f frps.log
tail -f frpc.log
6.3 性能优化
● 调整pool_count连接池大小
● 启用压缩和加密
● 使用KCP协议(高延迟网络)
七、安全建议
7.1 强密码策略
● 使用复杂token
● 定期更换密码
7.2 访问控制
allow_ports = 1000-2000,3000,4000
7.3 HTTPS加密
tls_only = true
八、一键安装脚本(可选)
#!/bin/bash
# 自动安装 frps
wget https://raw.githubusercontent.com/clangcn/onekey-install-shell/master/frps/install-frps.sh
chmod +x install-frps.sh
./install-frps.sh install
使用示例
假设你要暴露本地的3000端口Web服务:
服务端
配置好frps.ini,开放7000和8080端口
客户端配置
[common]
server_addr = 39.108.108.108
server_port = 7000
token = asdfqwer

[my-web]
type = tcp
local_ip=127.0.0.1
local_port = 3000
remote_port = 8080
访问
http://39.108.108.108:8080
这样就可以通过服务器的8080端口访问到本地的3000端口服务了。
正文到此结束
- 本文标签: 微信开发 内网穿透 frp
- 本文链接: https://www.iquanzi.top/article/2
- 版权声明: 本文由张华永原创发布,转载请遵循《署名-非商业性使用-相同方式共享 4.0 国际 (CC BY-NC-SA 4.0)》许可协议授权
热门推荐


相关文章
近期评论
-
来自: 若依实现导出多图功能

-
来自: 若依管理系统根据不同角色展示不同首页
